Wednesday 31 December 2014

Truncating Custom Objects


Truncating custom Object allows you to remove all of the object's records, while keeping the object and its metadata. When you truncate a custom Object Salesforce places a truncated object in the Deleted Object list for 15 days. It appears in deleted object list as objectname_trunc.

NOTE : During this time, the truncated object and its record continue to count against your org limits.

NOTE : Truncated Objects can not be restored to their original state.

Truncating object is a fast way to permanently remove all of the records from an object, while keeping object and it metadata intact for future use.

Lets play with truncation

I have created a custom object "TestObject" and inserted few records.

On object defination page I can not see "Truncate " button 


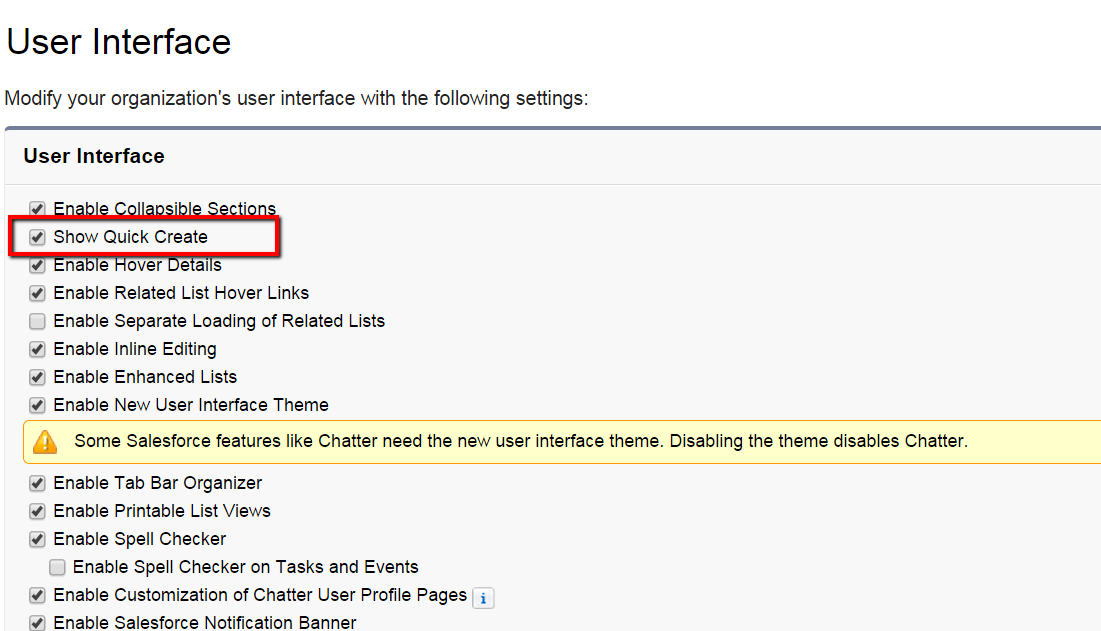
to enable Truncate go to Setup -> Customize -> User Interface and select "Enable Custom Object Truncate "


on saving it a new button "Truncate " started to appear on custom objects definition page.


Clicking on Truncate button will delete all the records present ( from recycle bin as well) and put the record in another object named as objectname_trunc in deleted object list.


Truncating is much faster than batch delete.

Important points
1. You can not truncate custom objects if they are referenced by another object through a look-up field.
2. You can not truncate custom objects if they are on Master side of a Master-Detail relationship.
3. You can not truncate custom objects if they contains geolocation field.
4. You can not truncate custom objects if they contains field marked as externalId.
5. Truncating custom object will remove custom object's history.
6. Truncating custom object erase all records currently in recycle bin.
7. Truncating object will erase related Tasks, Events, Notes, Attachments for each deleted record.

Salesforce preserves
1. Workflows, Actions, Triggers.
2. Sharing rules associates with custom object.
3. Validation Rules and Approval process.


Reference : Truncating Custom Objects Overview

Tuesday 30 December 2014

New Button in Look-up Window


When you create a new Look-Up or Master-Detail field on any custom object or on any standard object and then during look-up you see a New button clicking on it will allow you to create a new record on run from look-up window.

Before discussing more about it few important points to note :

1. This button is available only for Account and Contact.

New Button for Account Look-up


New Button for Contact Look-up


No New Button for Opportunity, same for other custom and standard objects


New Button for Master-Detail relationship with Account, same for Contact


2. Record created by clicking New button on look-up window will bypass validation rules.

If you want to remove this "New" button from lookup window then you can do it from Setup -> Customize -> User Interface and deselect "Show Quick Create " and save the settings.


after deselecting check the lookup window to confirm if New button is removed.


NOTE : Deselecting the check-box will disable Quick creation of Account, Contact and Opportunity from side panel.

Make Rich Text Field Mandatory Using Validation Rule


If you want to make field of data type Rich Text mandatory, what would you do?

One way to achieve this is by making field mandatory from page layout, that will work fine if you are creating records from salesforce UI but that won't work when you will upload data using Data-loader.


What will be the next approach, writing validation rule ? 
In validation rule you going to use ISNULL or ISBLANK ?

Lets try with ISNULL and ISBLANK one by one

1. ISNULL : Determine if expression is null (blank) and return TRUE if it is. If it contains value, this function returns FALSE.

create a validation rule and check ISNULL() for that rich text field like below snapshot.


in validation rule I have checked ISNULL(Rich_Text__c) and saved it. 
Now try to save the record without entering any value in Rich_Text__c field, validation rule won't work.

Why ISNULL didn't work?
According to Salesforce Text Fields are never null, so this function will always return FALSE.
Ok, then we should try with ISBLANK().

2. ISBLANK : Determines if an expression has a value and returns TRUE if it does not. If it contains a value this function will returns FALSE.

We will update validation rule from ISNULL to ISBLANK for rich text field like below snapshot.


validation rule : ISBLANK(Rich_Text__c)
Now try to save a record without entering any value in RIch_Text__c field, validation rule won't work in this case as well.
Salesforce doc says for text fields use ISBLANK, then why our validation rule is not working, Strange.

To make our validation rule to work we will use salesforce another function LEN()

3. LEN : returns the number of characters in specified test string
modify your validation to 
LEN( Rich_Text__c ) = 0


above validation will work


NOTE: above validation will work for text but won't work if you insert only
image and no text. 


Saturday 20 December 2014

Difference between SOQL and SOSL


SOQL stands for Salesforce Object Query Language
SOSL stands for Salesforce Object Search Language
SOQL can be used in apex triggers, apex classes
SOSL can not be used in apex triggers.

SOQL returns Integer or list of sObject
SOSL returns List of List of sObject

SOQL can be used for DML operations
SOSL can not be used for DML operations

Total no. of SOQL queries issued : 100
Total no. of SOSL queries issued : 20

Total no. of records retrieved by SOQL query : 50,000
Total no. of records retrieved by SOSL query : 2,000


Use SOQL when

1. you know in which objects or fields the data resides.
2. you want to retrieve data from single object or multiple objects that are related to one another.
3. you want to count number of records meeting the criteria in query.
4. you want to sort the result.
you want to retrieve data from number, date or checkbox fields.

Use SOSL when

1. you don't know in which object or field the data resides.
2. you want to retrieve data from single or multiple objects that may or may not relate to each other.

Saturday 13 December 2014

Rollup Summary for Lookup Field


Few days back requirement came across where there was a need to create a rollup summary field for objects which do not have Master-Detail relationship but lookup relationship, and we all know rollup summary field is only available for Master Detail so we left with no other option but to write Apex Code.

We have two objects LookupMaster__c and LookupChild__c having lookup relation.

  
We will write trigger on LookupChild__c for event after insert, after update, after delete.

trigger customRollup on LookupChild__c(after delete, after insert, after update){
    
    set<Id> masterIdSet = new set<Id>();
    
    if(trigger.isInsert) {
        for(LookupChild__c lookupRec : trigger.new) {
            masterIdSet.add(lookupRec.LookupMaster__c);
        }    
    } else if(trigger.isUpdate) {
        for(lookupChild__c lookupRec : trigger.new) {
            masterIdSet.add(lookupRec.LookupMaster__c);
        }
    } else if(trigger.isDelete){
        for(lookupChild__c lookupRec : trigger.old) {
            masterIdSet.add(lookupRec.LookupMaster__c);
        }
    } 
    
    if(masterIdSet.size() > 0) {
        customRollup rollUp = new customRollup ();
        rollUp.rollupAmount(masterIdSet);
    }
}

and will write an Controller to write logic for insert, delete and update.

public Class customRollup {
    
    public void rollupAmount(set<Id> masterIdSet) {
        Integer AmountVal = 0;
        
        list<LookupChild__c > childList = new list<LookupChild__c >();
        childList = [Select Id, Name, Amount__c, LookupMaster__c From LookupChild__c Where LookupMaster__c IN: masterIdSet];
        
        map<Id, Integer> masterChildMap = new map<Id, Integer>();
        
        for(LookupChild__c child : childList) {
            if(masterChildMap.containsKey(child.LookupMaster__c)) {
                AmountVal = masterChildMap.get(child.LookupMaster__c) + (Integer)child.Amount__c;
                masterChildMap.put(child.LookupMaster__c, AmountVal);
            } else {
                masterChildMap.put(child.LookupMaster__c, (Integer)child.Amount__c);
            }
        }
        
        list<LookupMaster__c> masterList = new list<lookupMaster__c>();
        LookupMaster__c m;
        for(Id master : masterChildMap.keySet()) {
            m = new LookupMaster__c();
            m.Id = master;
            m.Total_Amount__c = masterChildMap.get(master);
            masterList.add(m);
        }
        update masterList;
    }
}

after saving above code the Total_Amount__c field on LookupMaster__c object will get updated value every time its child record get inserted, updated or deleted. You can also implement the logic for undelete as well in above code.


Saturday 22 November 2014

Types of Sandbox


1. Developer Sandbox : Developer sandbox are intended for coding and testing. Developer sandbox copies all application and configuration set up information to sandbox.

2. Pro - Developer Sandbox : Pro Developer are intended for coding and testing. Copies all your production org reports and dashboards, price book, products, apps and customization but excludes all organisation standard and custom records, documents and attachments. Pro developer have large storage limit which allow more robust development and more test data sets

3. Partial Data Sandbox : Partial copy sandbox are intended to be used as testing environment and can be used for quality assurance tasks such as user acceptance testing and training. It includes reports and dashboards, pricebook, products, app, customization and custom and standard records, documents and attachments.

4. Full Sandbox : Exact copy of Production including all data, supports full performance testing, load testing.


Comparison :

Sandbox Name          Copies Metadata        Copies Data        Refresh Limit        Data Limit

Developer                    Yes                     No                Daily              200MB

Pro Developer             Yes                     No                Daily               1 GB

Partial                          Yes                     Yes               5 Days             5 GB

Full                               Yes                     Yes               29 Days      Same as Prod

Page Layout and Record Types 


Page Layout:
Page Layout is a organisation of fields, custom links, and related lists on Object detail page, From page layout we can see which fields links and related list a user will see and also decide which field should be read only and required. Page layout also provides us to create new page sections.


Record Types:
Record Type allow us to associate different business processes and subset of pick-list value to different users based on their user profile. Record type can be used to decide what page layout user will see while viewing the records based on their user profile. We can tailors our user interaction according to business specific needs.

Salesforce Activities : Difference between Task and Event

Activities in Salesforce are of two types Task and Event.

Task are basically used to log an activity like call, reminders, emails while Events are used scheduling meetings etc.

1. Tasks : A task is an activity not schedule for any date and time. You can specify a due date for a task or there may not be any particular date or time that task need to be completed
examples: 
 - making a phone call
 - opening a email

think of task like a check box whose value can only either be true or false.

2. Event : An event is an calendar event scheduled for a specific day and time
examples :
 - meeting, 
 - conference call

event carry a aspect of duration of time


Salesforce Relationships


In salesforce you can  associates objects with other objects using relationship.
You can define different types of relationships by define custom relationship fields and different relationship also determine the approach of data deletion, record ownership, security.

Types of Relationship:

1. Master - Detail (1:n) : Its a parent child relationship in which Master object controls the behavior of child object like
a) When master record is deleted its related detail/child record also gets deleted.
b) Owner field on detail/child object is not available and its owner is automatically set to owner of its Master object record.

c) Custom object of detail side of Master Detail relationship do not have sharing rule, manual sharing as these require Owner field.

d) Detail record inherit the sharing and security settings from its master record.
e) Master - Detail relationship field is required on page layout of the detail record.

f) By default detail records can not be re-parented, however administrator allow re-parenting by enabling "Allow re-parenting " option in the master detail relationship.

Note : You can define Master - Detail relationship between custom objects or between custom object and standard object but standard object can not be on the detail side.
Note : You can also not create master detail relationship where User or Lead objects are masters.

 * You can not create Master Detail relationship if custom object already contains data. To create Master Detail relationship first you need to create a look-up field and then converting them to Master detail if look-up field in all records contains a value.
* You can not delete a object if it is on Master Side of Master - Detail relationship and if you delete a object that is on detail side of Master - Detail relationship then relation is converted into look-up.
* Deleting Master record also delete related record.
* Undeleting Master record also undelete detail record.
Deleting detail record moves it to recycle bin.
* Undeleting detail record restores it.
* If you delete detail record and then separately delete Master record then you can not undelete related record because there is no Master record.


2. Many to Many : You can use Master Details relationship to create Many to Many relationship between two objects. This relationship allow each object to link with multiple record of other objects and vice-versa. Many to Many relationship requires a custom junction object with two master detail fields on page layout.


* Sharing access to junction object record is determine by the sharing access to both associated master objects records and Sharing setting option on relationship field. For example, if the sharing setting on both parents is Read/Write, then the user must have Read/Write access to both parents in order to have Read/Write access to the junction object. If, on the other hand, the sharing setting on both masters is Read-Only, a user with Read-Only rights on the master records would have Read/Write access to the junction object.

* user can not delete master object record if there are more that 200 detail object records.

* first master detail relationship you create becomes the primary relationship for junction object which affects
a) Look and Feel 
b) Record ownership

* second master detail relationship on junction object becomes the secondary relationship and if primary master-detail relationship is deleted then secondary becomes primary relationship.
* junction object can not be on Master side of another master-detail relationship.
* Many to Many provides two standard reports
1) "Primary master with junction object and Secondary master "
2) "Secondary master with junction object and Primary master"


3. Look-up Relationship :  This kind of relationship links two object. Unlike master-detail relationship look-up fields are not automatically required and data from one object appears as related list on page layout of other object.

* while creating look-up relationship we can select the option to make the field required.
* if look-up field is optional and look up record is deleted, we can select one of the below behaviors
a) "Clear the value of this field " ( this is default ) 
b) "Don't allow deletion of the look-up record that's a part of a look-up relationship"

* You can not delete an object or record in a look-up relationship if the combined number of records between two linked objects is more than 100,000.

Saturday 15 November 2014

Custom Component


Custom Components allows the custom visualforce functionality to be encapsulated as discrete modules, which actually provides two advantage:

1. Code re-use : custom component provides an functionality of code reuse, we can use the same code for number of pages.

2. Functional decomposition : if visualforce page is lengthy then we can broke down the page into custom components to make it easier to develop and easy to maintain.

like visualforce page custom component can also have controller but only custom component.

* Custom component do not have any associated security settings. A user with access to visualforce page have access to all custom component used in visualforce page.


example :

go to setup > develop >  custom componet  to create custom component and paste the below code.

<apex:component >
  <apex:attribute name="Contact" type="Contact" description="The contact to edit" required="true" />
  <apex:pageBlockSection columns="3" title="Name">
    <apex:inputField value="{!Contact.Salutation}"/>
    <apex:inputField value="{!Contact.FirstName}"/>
    <apex:inputField value="{!Contact.LastName}"/>
  </apex:pageBlockSection>
</apex:component>


go to :
to know about apex:attribute.


create visualforce page and paste below code

<apex:page standardController="Contact">
    <apex:sectionHeader title="Contact Edit" subtitle="{!contact.name}"/>
    <apex:form >
        <apex:pageBlock mode="maindetail">
            <apex:pageBlockButtons >
                <apex:commandButton value="Save" action="{!Save}"/>
                <apex:commandButton value="Cancel" action="{!Cancel}"/>
            </apex:pageBlockButtons>
            <c:ContactNameEdit contact="{!contact}"></c:ContactNameEdit>
            <apex:pageblockSection title="{!Contact}">
                <apex:inputField value="{!contact.phone}"/>
                <apex:inputField value="{!contact.doNotCall}"/>
                <apex:inputField value="{!contact.Fax}"/>
                <apex:inputField value="{!contact.hasOptedOutOfFax}"/>
                <apex:inputField value="{!contact.email}"/>
                <apex:inputField value="{!contact.hasOPtedOutOfEmail}"/>
            </apex:pageblockSection>
        </apex:pageBlock>
    </apex:form>
</apex:page>

Monday 10 November 2014

Change Images When Picklist value Changes


You can add create a functionality in which on change on picklist value the images will change. To do so add images in your static resource and create vf page and controller with below code. 


Visualforce page:

<apex:page controller="PicWithPicklist">
    <apex:form >
        <apex:pageBlock >
            <apex:selectList value="{!legend}" size="1">
                <apex:selectOptions value="{!legendNames}"></apex:selectOptions>
                 <apex:actionSupport event="onchange" reRender="picPanel"/>
            </apex:selectList>
        </apex:pageBlock>
    </apex:form>   
   
    <apex:outputPanel id="picPanel">
   <apex:image rendered="{!legend='jobs'}" value="{!$Resource.jobs}" width="200" height="200"/>
        <apex:image rendered="{!legend='gates'}" value="{!$Resource.gates}" width="200" height="200"/>
        <apex:image rendered="{!legend='benioff'}" value="{!$Resource.mark}" width="200" height="200"/>
        <apex:image rendered="{!legend='larry'}" value="{!$Resource.larry}" width="200" height="200"/>
    </apex:outputPanel>
</apex:page>

Controller :

public class PicWithPicklist {

    public String legend;
   
    public void setLegend(string legend) {
        this.legend = legend;
    }
   
    public String getLegend() {
        return legend;
    }
   
    public List<SelectOption> getLegendNames() {
        List<SelectOption> option = new List<SelectOption>();
        option.add(new SelectOption('None', 'none'));
        option.add(new SelectOption('jobs', 'Steve Jobs'));
        option.add(new SelectOption('gates', 'Bill Gates'));
        option.add(new SelectOption('benioff', 'Mark Benioff'));               
        option.add(new SelectOption('larry', 'Larry Ellison'));       
        return option;
    }
   
}  

Wednesday 5 November 2014

Winter 15 Release  - Advanced Setup Search


Winter 15 makes the search more powerful allowing to search for individual setup items which in earlier version only returned the titles of pages in setup menu. 

In earlier version when we tried to search workflow the result returned is like below picture.


but from winter 15 when tried to search workflow result returned would be


This feature is enabled for all organization by default. You can disable this feature from setup -> user interface


Tuesday 14 October 2014

Difference between renderAs, rendered and reRender


1. RenderAs :
it is used with page component with name of any supported content converter. Currently only PDF is the only supported content converter.

example: below code will give output in pdf form


<apex:page standardController="Account" renderAs="pdf">

    <apex:pageBlock title="welcome {!$User.FirstName}, ">
        <apex:pageBlockSection columns="1" title="here is your Account Detail :">
            <apex:outputField value="{!account.Name}"/>
            <apex:outputField value="{!account.AccountNumber}"/>
        </apex:pageBlockSection>
    </apex:pageBlock>
</apex:page>


2. Rendered :
it use to show or hide visualforce elements. It is bound Boolean value in controller which can be true or false making visualforce component display or hide. If not specified its value defaults to true.

example:

<apex:page controller="renderedController" sidebar="false" showHeader="false"                                                                                                                 action="{!accountDetail}">
    <apex:form >
        <apex:commandButton value="Show Button" action="{!showButtonMethod}"/>        
        <apex:pageBlock title="Hi {!$User.FirstName} {!$User.LastName} " id="pageBlock1"                                                                                                      rendered="{!showButton}">
            
            <apex:pageBlockSection title="Here is Account Details">
                <apex:outputField value="{!account.Name}"/>
                <apex:outputField value="{!account.AccountNumber}"/>
            </apex:pageBlockSection>
        </apex:pageBlock>
    </apex:form>
</apex:page>


public class renderedController {

    public Boolean showButton { get; set; }
    public Account account { get; set; }
    public Id accId { get; set; }
    public renderedController() {
        account = new Account();
        showButton = false;
    }
    
    public void accountDetail() {
        accId = ApexPages.CurrentPage().getParameters().get('id');
        if(accId == null) {
            apexPages.addMessage(new ApexPages.Message(ApexPages.Severity.INFO, 'Url Malformed'));
        } else {
        account = [Select Id, Name, AccountNumber From Account Where Id =: accId];
        }
        return ;
    }
    
    public void showButtonMethod() {
        if(accId == null) {
            showButton = false;
            apexPages.addMessage(new ApexPages.Message(ApexPages.Severity.INFO, 'Url Malformed'));
        } else {
            showButton = true;
        }
    }
}


3. Rerender
Rerender is used to refresh one or more component. It contains the single Id of the component or list of IDs separated by comma.

example:

<apex:page controller="reRenderController" sidebar="false" showHeader="false"                                                                                                                        action="{!pageMethod}">
    <apex:form >
        <apex:commandButton value="Display Block" rerender="pageBlock1"                                                                                                                                action="{!accountDetail}"/>
        <apex:pageBlock id="pageBlock1">
        <apex:pageMessages />
            <apex:pageBlockSection >
                <apex:outputField value="{!account.Name}"/>
                <apex:outputField value="{!account.AccountNumber}"/>
            </apex:pageBlockSection>
        </apex:pageBlock>
    </apex:form>
</apex:page>


public with sharing class reRenderController {
    public Account account{ get; set; }
    public String accId { get; set; }
    
    public void pageMethod() {
        account = new Account();
        accId = ApexPages.CurrentPage().getParameters().get('id');
        if(accId == null)
            ApexPages.addMessage(new ApexPages.Message(ApexPages.Severity.INFO, 'No AccountId'));
    }
    
    public void accountDetail() {
        try {
            account = [Select Id, Name, AccountNumber From Account Where Id =: accId];
        } catch(Exception e) {
            system.debug(' **** ' + e.getMessage());
            ApexPages.addMessage(new ApexPages.Message(ApexPages.Severity.INFO, e.getMessage()));
        }
    }

}


Thursday 9 October 2014

What is My Salesforce Edition


Have you ever came across a situation where you need to know what is your Salesforce Org edition. If yes what you have done ? 

There are few easy ways to find out Salesforce edition.

1. From your web browser's Salesforce tab

Hover mouse over your salesforce tab in your web browser


in above snapshot text appears as "salesforce.com - Developer Edition "


when lands on Account tab text changes to
"Accounts: Home ~ salesforce.com - Developer Edition "

but the edition name always mentioned at last "Developer Edition",
It will work for other edition as well.
 
 
2. Second way to find out the edition is by clicking  SETUP > ADMINISTER


Hope this will help